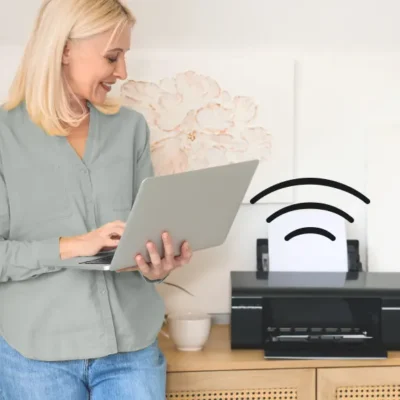
Canon Printers that are laced with the Wireless Setup Wizard feature can be used to print wirelessly. But to use a new Canon Printer wirelessly, you need to set up it to the WiFi network of your home or office. This process can be easily completed if you are approaching the right way to do so. But in case you are not aware of the way to connect Canon Printer to WiFi then you may be puzzled in setting up WiFi to your printer. One who has bought a new Canon Printer and looking to connect it to the WiFi has come to the right page as this read is going to make you learnthe complete process of Canon Printer setup.
To complete the setup process of your Canon Printer, you need to install the Canon Printer drivers on your Windows computer or Mac. You may be asked to provide the WPS PIN of your printer while setting up Canon Printer to WiFi. So, with no further delay, let’s proceed to the Canon Printer WiFi setup process.
Way to Canon Printer Setup
You need to install the Canon Printer drivers on your computer to complete this process. If you are not familiar with the driver installation process then you can refer to the steps that are given in the next section.
1: Install the Canon Printer Driver
To get the driver files and install them on your computer, you need to follow the steps that are given below:
- Open a web browser on your Mac or Windows computer
- Go to the Canon Printer support page
- Then, you need to find the ‘Download’ button and click on it
- Now, you are asked to provide the model number of your printer
- After entering the model number, click the ‘Search’ icon
- Then, you need to click on the ‘Driver Setup File’ link
- The setup file will be downloaded to your device
- Get the setup file and then right-click on it
- Then, you need to agree to the Canon Printer terms of use
- Now, follow the on-screen instructions to complete the installation process
- Then you need to find and click ’Finish setup’ to complete the process
- Now, you are ready to start the process to connect Canon Printer to WiFi
2: Add Canon Printer to Computer
After installing the driver files on your computer, you need to follow the steps to add the Canon Printer to your computer:
- Open the search dialogue in your device
- Then, type ‘Settings’ in it and tap the ‘Enter’ button
- Now, find and click the ‘Devices and Printers’ option
- Here look for the ‘Add a new Device’ option, click on it
- Then, choose your Canon Printer from the available printer’s list
- Enter the required information and follow the remaining steps to add the printer
- In the end, find and click the ‘Install’ button to complete the Canon Printer setup process
- Now, you have added your Canon Printer to your device
After going through the above steps, your Canon Printer will be connected to the WiFi. Now, you can print wirelessly using your Canon Printer.
Tips to fix Canon Printer won’t connect to WiFi issue
If you are not able to connect your Canon Printer to WiFi then you need to approach the tips that are given below:
- Make sure the connection between your WiFi router and printer is established
- The computer and printer should be connected to the same router
- If your printer is not turned on then turn it on
- Check the cable connections of your printer
- Make sure the driver files are installed correctly
Conclusion
To sum up, Canon Printers can be quickly set up to WiFi if you are approaching the correct path to do so. For the people who are struggling while going through the Canon Printer setup process, we have mentioned clear instructions above on this page. Now, we hope that you have completed the process to connect Canon Printer to WiFi with the help of this post.