Nowadays almost all types of communication devices are laced with WiFi features. This feature helps you to connect your mobile or computer to the internet. You can turn on your WiFi and then easily connect to available WiFi networks in your area. This is simple and quick but in case you are facing any issue while connecting your Windows 10 computer to the internet then may need to approach the right way to do that. On this page, we are going to discuss the ways to connect to WiFi on Windows 10. So, if you are also puzzled by this process then you need to refer to the steps that we have given in this post.
Manually connect to WiFi on Windows 10
People who have the passcode of the WiFi network which they want to connect to a Windows 10 computer can easily do so by approaching the steps that are given below. Before approaching the steps that are given below, make sure that the network which you want to connect with Windows 10 computer has internet. If you are looking to connect your router with your device then you need to check that the router is in working mode or not.
- Turn on your Windows 10 computer
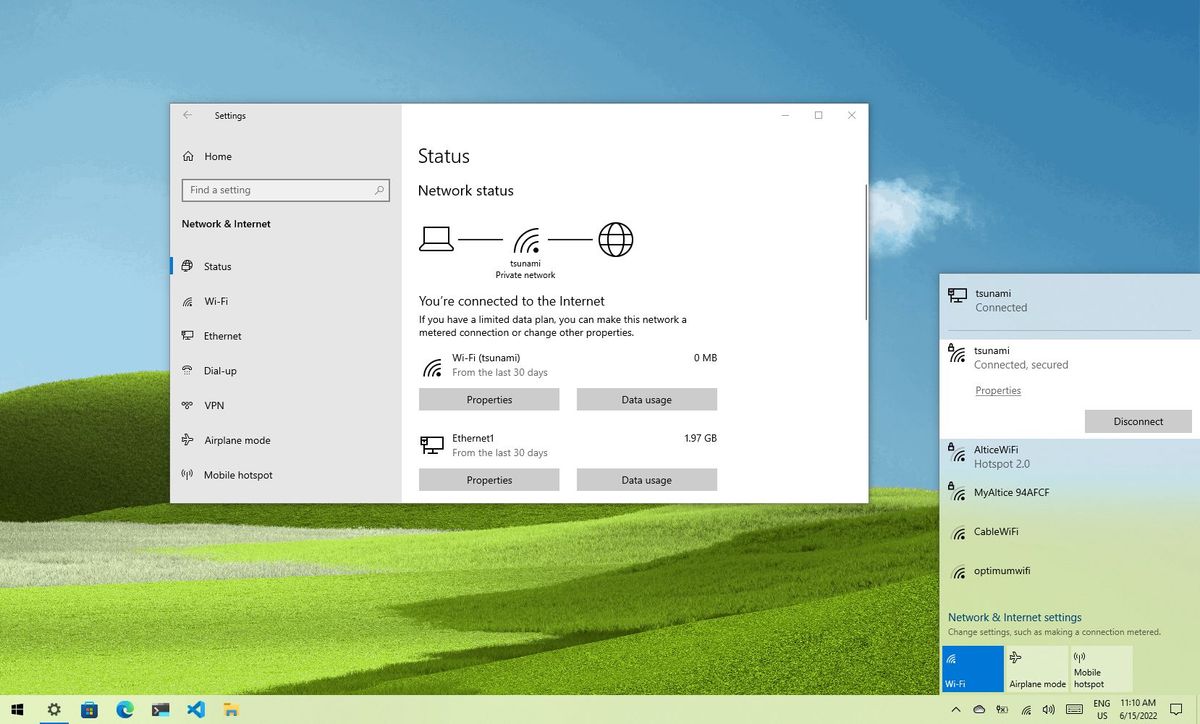
- Now, find the ‘Network’ icon and click on it
- Look for the WiFi address and then click on it
- Now, choose the ‘Connect’ button
- Then, type the password details correctly
- Click on the ‘Show Password’ button
- Check the password carefully and click the ‘Connect’ button
- Let Windows 10 complete the authentication process
- After a few seconds, the WiFi network will be connected to your device
- Finally, you have completed the steps to connect to WiFi on Windows 10
Way to Connect to WiFi on Windows 10 without Ethernet
If you are looking for a way to connect to WiFi on Windows 10 without Ethernet cable then you need to approach the steps that are given below:
- Switch on your Windows 10 Pc
- Now, Get the ‘Network’ icon and click on it
- Find the WiFi address and then click on it
- Then, you need to choose the ‘Connect’ button
- Here you are asked to provide the security key details of your WiFi network
- Find and click on the ‘See Password’ icon
- Review the password carefully and then click the ‘Connect’ button
- Now, let your Windows 10 computer verify the network
- After a few seconds, the WiFi network will be connected to your device
- Finally, you have completed the steps to connect to WiFi on Windows 10
Can’t connect to WiFi on Windows 10
If you can’t connect to WiFi on Windows 10 you need to follow the tips that we have mentioned below:
- Confirm that router is in working mode. If not, then try to fix the issues with the router first and then try to access the internet to your Windows 10 device.
- Check that the LAN is in good condition, if this is faulty then try to change it immediately.
- Check the password details and then enter them again, if they are incorrect.
- Try to change the Network adopter settings by enabling and disabling them. You can easily locate the setting by following the steps that are given below:
- On your Windows 10 computer, find and click ‘Network’ Icon
- Then, click on the ‘Network and Settings’ option
- Look for the ‘Change adopter settings’ and click on it
- Find the available WiFi network
- Right-click on the shown network and choose the ‘Disable’ option
- Now, try to enable the network by using the same process
Conclusion
To sum up, the process to connect to WiFi on Windows 10 is quite easy and clear. If you are not sure about this process then you can easily connect your Windows 10 to WiFi by going through the steps that we have given above on this page. We have also concluded the solutions to fix the can’t connect to WiFi on Windows 10 issue in this post. We hope that you have connected your Windows 10 computer to the internet with the help of this post.